

You set up your illumination incubator, dialed in the parameters, and walked away expecting perfect conditions. A few hours later, you come back — and nothing looks right. Maybe the temperature won‘t stabilize. Maybe the lights aren’t turning on. Or worse, you open the door and see condensation dripping onto your precious samples.
Don‘t worry — you’re not alone. Even the best equipment acts up sometimes, and most of the time the fix is simpler than you think. This guide walks through the most common problems users face with illumination incubators, what causes them, and how to get things back on track quickly.
Let‘s go problem by problem.

Problem 1: Temperature Issues (Too Hot, Too Cold, or Jumping Around)
Temperature problems are by far the most common complaint — and usually the easiest to fix.
The Incubator Won’t Reach the Set Temperature
If your chamber is struggling to hit the target temperature, start with the basics:
- Check the door seal. A worn or cracked gasket lets cold air escape and warm air sneak in. Run your hand around the closed door — feel any drafts? If the seal looks brittle or flattened, it‘s time to replace it.
- Look at the condenser coils. Dust buildup on the coils blocks heat exchange, forcing the system to work harder. Unplug the unit and clean the coils with a soft brush or vacuum.
- Verify your setpoint. It sounds obvious, but double-check that you didn’t accidentally punch in the wrong number. A simple typo happens more often than you‘d think.
If none of these help, the problem could be deeper — a failing compressor or a drifting temperature sensor. Both require a service call.
The Temperature Keeps Climbing Too High
An incubator that runs too hot usually points to the heating system:
- Test the heater. Using a multimeter, check the resistance across the heating element. An infinite reading means the heater has burned out and needs replacement.
- Look for a stuck relay. Sometimes the relay that controls the heater gets stuck in the “on” position. Cycling power may reset it — but if the problem returns, the relay likely needs replacing.
Temperature Fluctuates Wildly
A chamber that swings between too hot and too cold is frustrating and bad for your experiments.
- Is the circulating fan running? Put your hand near the air vent. Feel airflow? If not, the fan may have stopped — and without circulation, temperature distribution falls apart.
- Are you opening the door too often? Every time you open the door, room air rushes in. Minimize door openings during critical runs.
- Check the sensor connection. A loose temperature sensor probe can send erratic readings to the controller. Push it back into place if it looks loose.

Problem 2: Lighting System Malfunctions
Lighting problems are another frequent headache — especially in chambers that run 16-hour photoperiods day after day.
Lights Won‘t Turn On
When the lights stay dark, don’t panic. Work through these steps:
- Check the obvious first. Is the power on? Is the lighting switch actually turned on? Sometimes the fix really is that simple.
- Test for voltage. Use a multimeter to check voltage at the lamp terminals. If voltage is present but the lamp stays dark, the bulb or tube has likely failed. Replace it with the same type and rating.
- No voltage at the lamp? The issue is probably the ballast (for fluorescent tubes) or the LED driver. Those components fail over time and need replacement.
Pro tip: Fluorescent tubes lose about 30% of their brightness after 2,000 hours of use. If your chamber seems dimmer than it used to be, swapping in fresh tubes — in matched pairs — can make a dramatic difference. LED modules typically last much longer (up to 50,000 hours), but individual LEDs can still fail and need replacement.
Uneven Light Distribution
Patchy lighting creates inconsistent plant growth across your chamber:
- Check for aging tubes. When fluorescent tubes age, they don‘t all dim at the same rate. Replacing them as a set restores uniformity.
- Clean the reflectors. Dust and grime on the reflective surfaces can cut light output by a surprising amount. A simple wipe-down often helps.
- Rearrange your samples. Sometimes the problem isn’t the light — it‘s what you placed in front of it. Make sure taller containers aren’t shading smaller ones.
Problem 3:Humidity Problems
Humidity control can be tricky, especially in chambers that need to maintain very high or very low moisture levels.
Humidity Won‘t Go Down
Too much moisture in the chamber can lead to condensation and contamination:
- Check the drain line. A clogged drain prevents condensed water from leaving the chamber, causing humidity to climb. Clear any debris from the drain tube.
- Is the humidifier stuck on? If the humidifier runs continuously regardless of setpoint, the humidity sensor or control circuit may have failed. The sensor needs calibration or replacement.
- Try ventilating briefly. Opening the door for a minute can help lower excessive humidity quickly, though this is a temporary workaround.
Humidity Won‘t Go Up
Low humidity dries out media and stresses plants:
- Check the water supply. Is the humidifier reservoir empty? Refill it with distilled water — tap water leaves mineral deposits that clog the system over time.
- Inspect the ultrasonic disc or electrode. Mineral buildup on the humidifier components reduces their ability to generate mist. Clean the disc with a mild acid solution (white vinegar works well).
- Recalibrate the humidity sensor. A sensor that reads higher than actual humidity will never trigger the humidifier to turn on. Compare the reading against a reliable external hygrometer and recalibrate if needed.
Problem 4: Compressor and Refrigeration Problems
The refrigeration system is the heart of any cooled incubator. When it stops working properly, everything else suffers.
Compressor Won‘t Start
A silent compressor usually means one of three things:
- Power supply issue. Check the voltage at the outlet. If voltage is too low, the compressor won’t engage. Wait for power to stabilize.
- Faulty start relay. The start relay gives the compressor its initial kick. If it fails, the compressor won‘t turn over. Replace the relay.
- Overload protector tripped. Compressors have a built-in safety that shuts them down if they overheat. This usually happens when the condenser coils are dirty or the room is too hot. Clean the coils, improve ventilation, and let the compressor cool down. It may reset on its own.
Compressor Runs But Doesn’t Cool
The compressor is humming along, but the chamber stays warm. Now what?
- Look for a refrigerant leak. Check the copper lines and fittings for oily residue — that‘s a telltale sign of leaking refrigerant. If you find it, call a professional. Refrigerant handling requires special equipment and certification.
- Blocked refrigerant line. Sometimes the capillary tube (the thin line that meters refrigerant flow) gets clogged. This also requires professional service.
A note on compressor operating modes: Some incubators run the compressor continuously (balanced mode), which provides stable temperatures and is actually better for compressor longevity. Others cycle the compressor on and off. Frequent on-off cycling — often caused by repeatedly opening the door — can shorten the compressor‘s lifespan.
Problem 5: Fan and Airflow Problems
Good airflow is essential for temperature and humidity uniformity. When the fan fails, you’ll notice it quickly.
Fan Is Noisy or Not Spinning
- Loose mounting screws. A fan that vibrates or rattles loudly may have loosened over time. Tighten the mounting screws.
- Bearings need lubrication. Many fan motors have sleeve bearings that dry out after years of use. A drop of high-temperature oil can quiet things down — but if the noise returns quickly, plan to replace the fan.
- Debris on the blades. Dust accumulation can unbalance the fan, causing noise and reducing airflow. Clean the blades carefully.
No Airflow at All
If you put your hand near the vent and feel nothing:
- The fan motor has failed. Replacement is the only fix.
- Check the fan capacitor. Some fan motors use a start capacitor. If it fails, the motor won‘t spin.
Quick diagnostic test: Open the door and place your hand near the bottom of the chamber. Can you feel air moving through the vents? If not, the circulation fan has likely stopped.
Problem 6: Electrical and Control System Glitches
Modern illumination incubators rely on microprocessor controllers. When the electronics act up, the whole unit can seem possessed.
Unit Won‘t Power On
- Check the power cord and outlet. It sounds basic, but loose connections cause many service calls. Plug something else into the same outlet to confirm it has power.
- Inspect the fuse. Most incubators have a fuse in the back. If it’s blown, replace it with one of the exact same rating. Caution: If the new fuse blows immediately, there‘s a short somewhere — stop and call for service.
- Test the power switch. Switches can fail internally. If you have a multimeter, check for continuity across the switch.
Display Shows Error Codes or “—-”
A flashing error code or dashed display usually means one thing: the temperature sensor has failed or disconnected.
- Check the sensor connection. Open the control panel and make sure the sensor wires are firmly seated in their terminals.
- Replace the sensor. If the connection looks good but the error persists, the sensor itself has likely failed. Pt100 sensors are common replacements.
Alarm Won‘t Stop Beeping
False alarms are annoying — and they can make you ignore a real problem later.
- Check your alarm settings. Sometimes the high or low temperature limit is set too close to the operating setpoint. A small drift can trigger the alarm. Widen the limits if needed.
- Door switch issue. If the chamber thinks the door is open, it may trigger an alarm. Clean the door switch contacts.
Preventive Maintenance: The Best Fix Is No Fix
Here‘s a number worth remembering: regular cleaning and basic upkeep can prevent more than 80% of common incubator problems. Seriously.
Here’s a simple maintenance routine to keep your illumination incubator running smoothly:
| Frequency | Tasks | Time Required |
| Daily | • Check temperature and humidity displays for normal readings• Listen for unusual fan noises• Verify lights turn on/off according to schedule | 30 seconds |
| Weekly | • Wipe down interior surfaces with a mild, non-corrosive cleaner (avoid bleach or strong acids)• Inspect door gasket for cracks or flattening• Top off water reservoir with distilled water (if applicable) | 5 minutes |
| Monthly | • Unplug unit and vacuum condenser coils• Clean or replace air intake filters• Inspect drain line for clogs• Check shelf clips and fasteners for tightness | 15 minutes |
| Every 6 Months | • Calibrate temperature and humidity sensors against certified references• Replace fluorescent tubes after >2,000 hours of use• Inspect electrical connections for overheating or corrosion | 30 minutes |
When to Call a Professional
Some problems are DIY-friendly. Others are not. Call for service if:
- You suspect a refrigerant leak or compressor failure.
- The main control board has failed.
- You smell burning electronics or see smoke.
- You’ve tried the basic fixes and the problem persists.
And always remember: Before opening any panel or touching any electrical component, unplug the unit. Always.
Final Thoughts
An illumination incubator is an investment — not just in equipment, but in the research that depends on it. Taking a few minutes each week to check on your chamber can save you hours of troubleshooting later.
If you‘re experiencing a problem not covered here — or if you’ve tried the steps above and nothing has worked — the Drawell support team is ready to help. We‘ve seen just about every issue an incubator can throw at you, and we can walk you through the fix or arrange service if needed.
Need help with your Drawell illumination incubator?
→Contact our technical support team
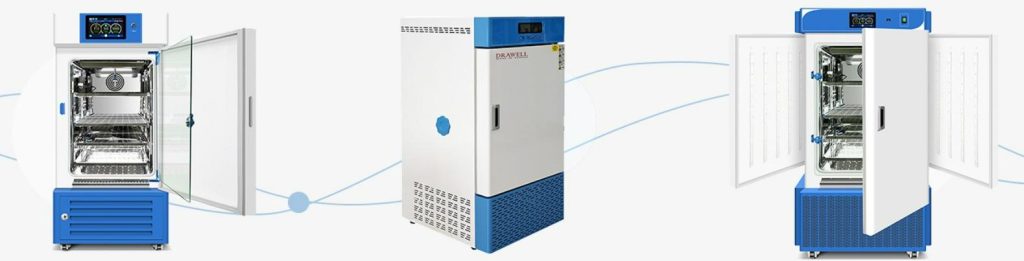
Related Products Recommendation

Get Quote Here!
Latest Posts


What Next?
For more information, or to arrange an equipment demonstration, please visit our dedicated Product Homepage or contact one of our Product Managers.


