


A digital viscometer is a key instrument for measuring the viscosity of liquids. It supports manufacturers and labs in judging how fluids move, keeping product performance steady, and improving overall quality control. You can find these tools in chemicals, food and drinks, medicines, personal care products, varnishes and coatings, and petroleum work.
Even though digital viscometers are easy to operate, good results do not happen by chance. Accurate and repeatable measurements require correct setup, good sample handling, the right spindle, the chosen rotation speed, and environmental conditions. If the procedure is sloppy, the data can become shaky. That can also cause uneven product quality and extra rounds of testing.
When an operator knows how to use a digital viscometer, results tend to stay dependable. It can also help the instrument last longer. Below is a guide to the key steps, common mistakes, and best practices for accurate viscosity measurement.
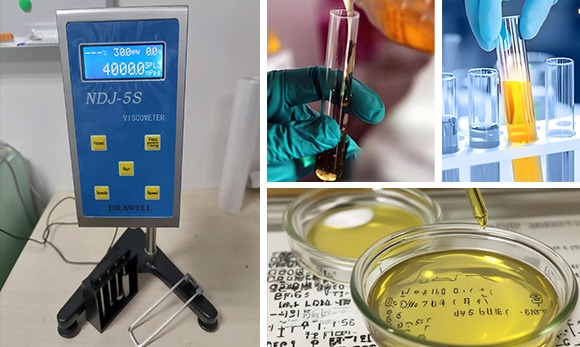
Understand the Working Principle of a Digital Viscometer
A digital viscometer works by measuring how much effort it takes to turn a spindle in the liquid. The device uses the torque needed for rotation at a set speed. After that, it calculates and shows the viscosity value on its screen.
Viscosity results shift based on multiple items. The sample temperature matters. So does spindle shape and size. Rotational speed also plays a role. The fluid’s behavior under shear is important too.
Some liquids, like water and many basic oils, act close to Newtonian fluids. In those cases, viscosity stays fairly steady for a given temperature. Other products do not act that way. Paints, creams, gels, and polymer mixes can show viscosity that changes with shear.
Because of that, operators should stick to the manufacturer’s directions. They should also keep test conditions the same when comparing results.
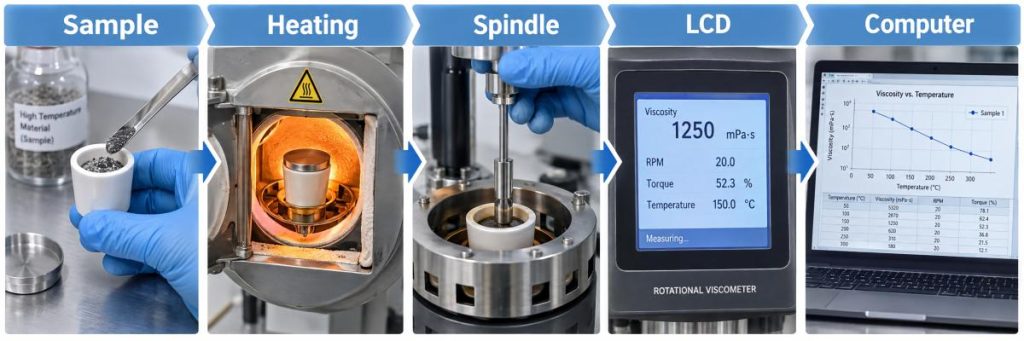
A Step-by-Step Guide to Using a Digital Viscometer
Step 1. Prepare the Digital Viscometer Before Testing
Start with setup. This is where accurate data begins. Before you measure anything, look over the unit. Confirm it is in good working order. Also make sure every part you will use is right for the sample.
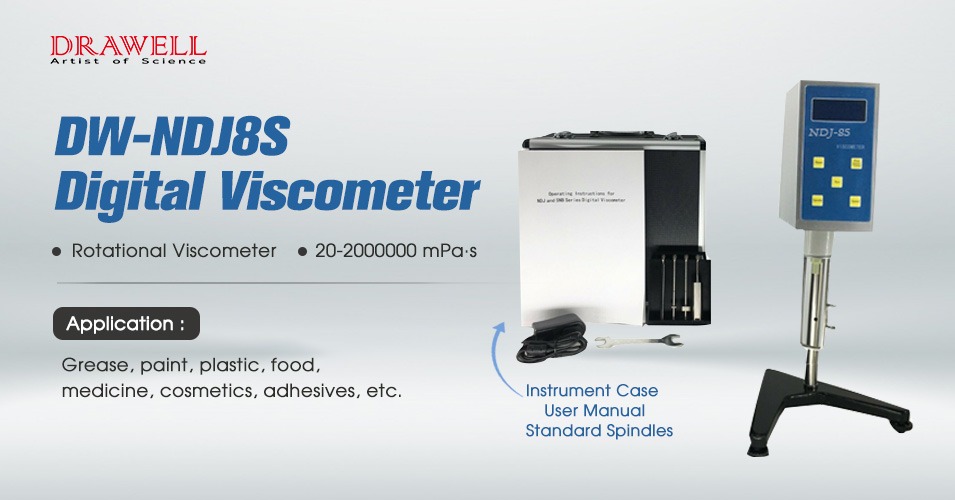
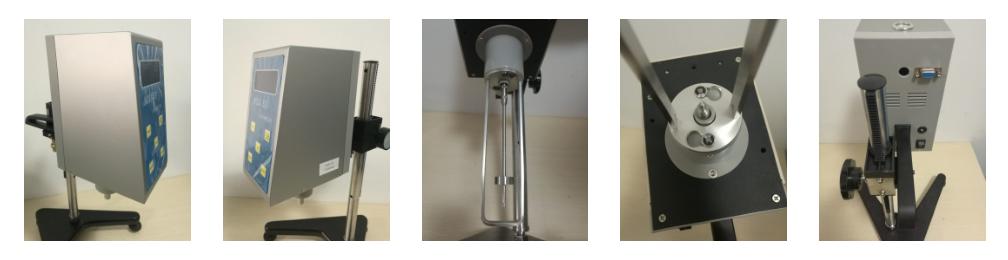
Set the digital viscometer on a firm, flat bench. Avoid rocking surfaces and places with strong vibration. If the support is not stable, the reading can be off. Make sure the unit is mounted firmly. Also check the spindle fit and confirm the connection is clean and not bent or damaged.
Turn the device on. Let it finish any startup sequence. If the manufacturer asks for a warm-up time, wait the required amount. Then review the screen. Check the calibration status and scan for any alerts or error notes before you proceed.
Next, clean the spindle, the sample cup, and any protective parts you will use. Leftover material from earlier tests can contaminate the new sample. It can also disrupt how the spindle rotates. If the device needs calibration or a check run, complete it using the manufacturer’s steps and proper reference standards.

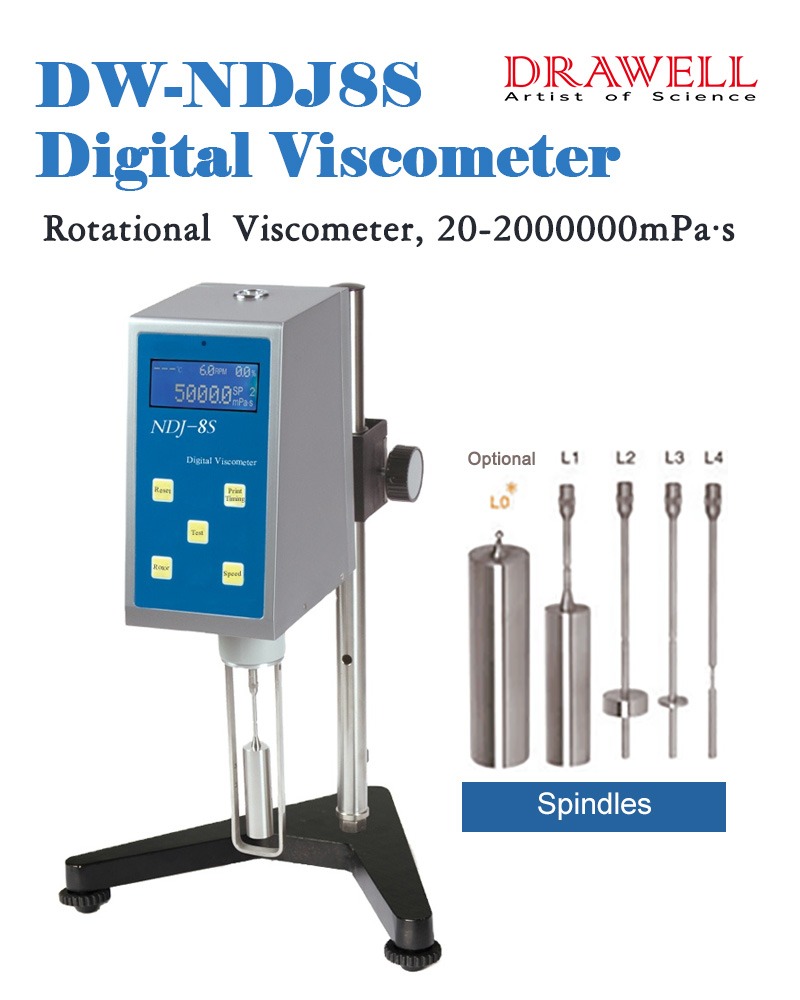
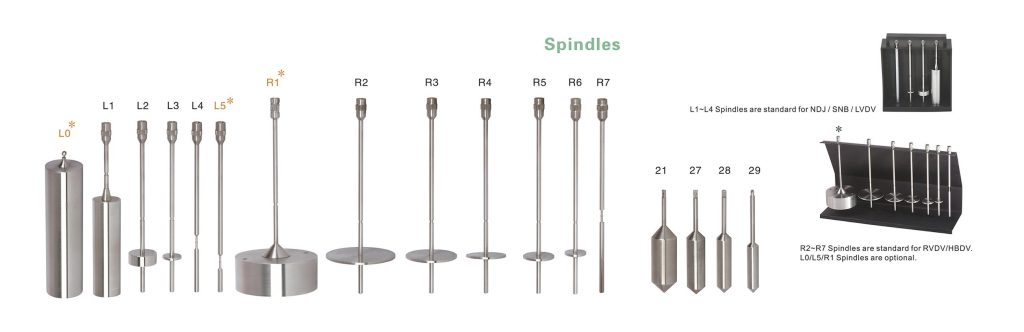
Step 2. Select the Correct Spindle and Rotational Speed
Choosing a spindle and setting the rotational speed matter a lot in viscosity testing.
Each spindle fits certain viscosity levels and sample types. If the spindle does not match the liquid, the torque can land outside the recommended limits. That can also lead to readings that do not stay steady.
With most digital rotational viscometers, choose spindle and speed so the torque falls in the range the maker lists for normal use. Some units show torque in percent form. That display can help you judge whether the settings fit.
Low torque can mean the instrument does not detect changes well. High torque can push the unit too hard. It can also make the results less dependable. If the torque goes beyond the stated range, change to another spindle or modify the speed, using the directions from the manufacturer.
For non-Newtonian fluids, speed can change the apparent viscosity you measure. If you want to compare results between batches, write down the spindle number and the rotational speed, and keep the settings the same each time.
Step 3. Prepare the Sample Properly
How you prepare the sample affects how trustworthy the measurements are. Before you test, confirm the sample truly represents what you want to measure.
If mixing is needed, stir slowly to bring the sample to uniform condition. Try not to pull in too many air bubbles. Trapped air can disturb spindle movement and cause unstable readings. This risk is higher with thicker materials like creams, adhesives, and gels.
If the sample has solid particles, use a preparation path that fits that material. Do not filter or change the sample unless the test plan says to. Altering it can shift the original behavior.
Use a container that matches the instrument method you are using. Fill it to the required level. The spindle should go into the liquid correctly and not hit the bottom or the sides.
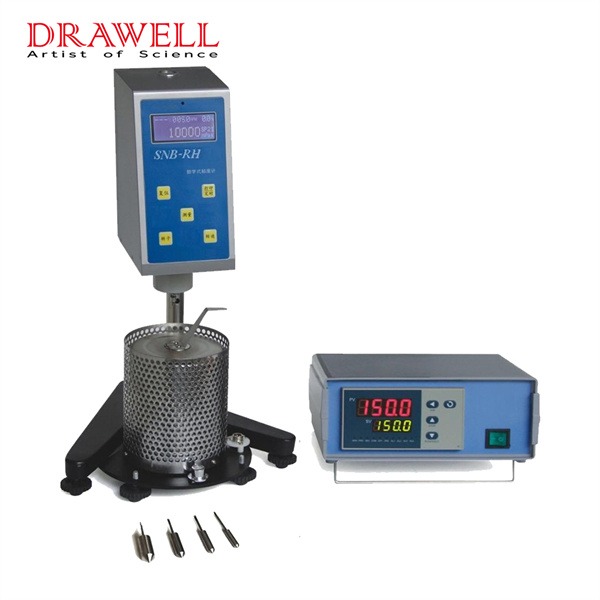
Temperature also plays a major role. Viscosity can move a lot as temperature changes. Let the sample reach the set test temperature before you start measuring. If the product is temperature sensitive, use a suitable temperature control setup. Also watch the sample temperature during the full test.
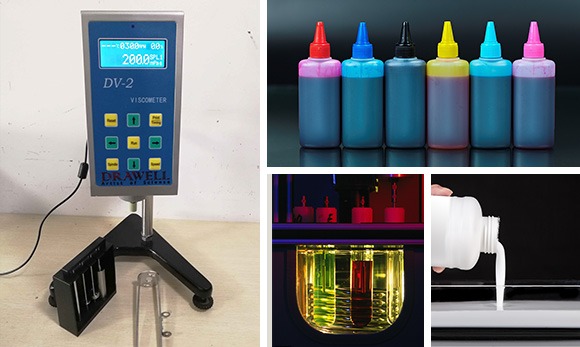
Step 4. Position and Immerse the Spindle Correctly
When the sample is ready, attach the spindle the way the maker explains. Take care to avoid bending the spindle. Do not press too hard on the part that connects.
Lower the spindle into the sample until it reaches the immersion line, when one is used. Keep the spindle centered in the container. Make sure it does not touch the container walls or the bottom.
Incorrect immersion depth can change the flow around the spindle. That can shift the measured value. Also, if the spindle sits off center, readings may vary. It can even create contact with parts of the setup.
Once the spindle is in place, let the sample and the instrument rest. Give it a short settling period. If you can see bubbles near the spindle, remove them first. Use a suitable approach for the material. Do not start the run until the spindle is set right and the sample is ready.
Step 5. Start the Measurement and Wait for a Stable Reading
Check that the spindle, speed, sample temperature, and immersion depth are correct. Then start the viscometer.
Let the spindle run for the time stated in the test method. Or keep waiting until the reading stops moving too much. Some materials stabilize fast. Others need longer because of viscosity effects. They may show thixotropic behavior or changes in structure under shear.
Do not automatically save the first value that appears. Watch the display. Decide if it meets the lab acceptance rules.
If the viscosity reading keeps jumping around, look for vibration first. Also check for air bubbles. Temperature drift matters. Confirm the spindle choice and the rotational speed. For non-Newtonian materials, think about time effects too. Continuous rotation can make viscosity change.
When the reading is stable, write down the viscosity value. Include the test conditions used. If the method asks for repeats, run the test again. Use the required sampling and prep steps.
Step 6. Record and Interpret the Measurement Results
A viscosity number is clearer when you also record how it was measured. If you write down only the figure, repeatability drops. It is also harder to compare results across batches.
A good test record should include the sample ID. Add the viscosity reading and the unit. Include the spindle type or spindle number. Record rotational speed. Also note sample temperature and measurement time. List the instrument ID as well. If the procedure allows it, note torque percentage. Add any unusual notes from the run.
For instance, two paint samples of the same product can give different viscosity values. This can happen if the temperature or rotation speed differs. That is not always an instrument fault. It can show real flow behavior in the material.
For quality review, compare the result with the product requirement. Or compare with a reference value from the same test method. If the value is outside the acceptance range, recheck the conditions. Then repeat the measurement if required. Only then make a quality decision.
Step 7. Clean and Maintain the Digital Viscometer After Use
Clean-up and upkeep help keep accuracy steady. They also help prevent cross-contamination.
After testing, turn the spindle off before you remove it. Use the shutdown steps from the manufacturer’s manual. Then take the spindle off slowly. Wipe and clean it with a cleaner that matches the parts. Make sure the cleaner works with both the spindle material and the liquid you tested.
Be careful not to scratch or bend the spindle. Do not drop it. Also, do not let dry residue build up on the shaft or on any connecting area. Leftover material can shift later readings.
Clean the main unit body using a safe approach for that equipment. Keep any liquid away from plugs, wires, and parts that can be harmed by moisture. When you store spindles, put them back in the holder or in a protective case. This helps prevent dents and other damage.
Periodic inspection, performance verification, and calibration should be conducted according to the manufacturer’s recommendations and the laboratory’s quality management requirements. Keep maintenance records to help identify potential instrument problems before they affect production or testing.
Common Mistakes When Using a Digital Viscometer
Even a high-quality digital viscometer can produce inaccurate results if the testing procedure is not followed correctly. Recognizing common mistakes helps operators improve repeatability and reduce testing errors.
| Common Mistake | Potential Impact on Measurement | Recommended Solution |
| Selecting the Wrong Spindle | Produces inaccurate readings or torque values outside the recommended range | Choose a spindle suitable for the sample’s viscosity and the instrument’s specifications |
| Using an Incorrect Rotational Speed | Causes inconsistent results, particularly for non-Newtonian fluids | Select the appropriate speed and maintain consistent settings during comparisons |
| Ignoring Sample Temperature | Leads to significant viscosity variations and unreliable comparisons | Control and record the sample temperature before and during testing |
| Incorrect Spindle Immersion Depth | Changes the measurement conditions and affects reading accuracy | Immerse the spindle to the specified mark without touching the container bottom |
| Allowing Air Bubbles in the Sample | Causes unstable readings and unrepresentative measurements | Prepare the sample carefully and remove trapped air using a suitable method |
| Measuring Before Readings Stabilize | Results in poor repeatability and unreliable data | Wait until the reading meets the stability criteria of the testing procedure |
| Using a Contaminated Spindle | Causes cross-contamination and alters subsequent measurements | Clean the spindle thoroughly with a compatible cleaning agent after each test |
| Placing the Instrument on an Unstable Surface | Vibration and movement interfere with measurement stability | Use a firm, level workbench away from vibration sources |
| Overlooking Instrument Calibration | Allows measurement drift or instrument errors to go undetected | Perform regular calibration or verification according to the manufacturer’s instructions |
| Using an Unsuitable Sample Container | Alters flow conditions or causes the spindle to contact the container | Select the specified container size and maintain proper spindle clearance |
| Applying Inconsistent Sample Preparation | Creates differences between repeated tests or batches | Standardize mixing, resting time, and other preparation steps |
| Failing to Record Test Conditions | Makes results difficult to reproduce or compare | Document viscosity, temperature, spindle, speed, and other required test parameters |
Best Practices for Accurate and Repeatable Digital Viscometer Measurements
To achieve reliable digital viscometer measurements, establish a standardized operating procedure and ensure that all operators follow the same steps.
| Best Practice | Recommended Procedure | Benefits |
| Standardize Sample Preparation | Use consistent mixing, resting time, and sample handling procedures | Reduces sample variability and improves repeatability |
| Control Sample Temperature | Maintain the specified test temperature and allow the sample to reach thermal equilibrium | Minimizes temperature-related viscosity fluctuations |
| Select the Appropriate Spindle | Choose a spindle suitable for the sample’s viscosity range and the instrument’s specifications | Improves measurement sensitivity and reliability |
| Set the Correct Rotational Speed | Follow the specified testing method and maintain consistent speed settings | Ensures comparable results, especially for non-Newtonian fluids |
| Maintain Proper Spindle Position | Immerse the spindle to the required depth and prevent contact with the container | Reduces positioning errors and measurement interference |
| Eliminate Air Bubbles | Prepare samples carefully and remove trapped air using an appropriate method | Prevents unstable readings and unrepresentative measurements |
| Allow Readings to Stabilize | Wait until the displayed value meets the test method’s stability criteria | Improves measurement consistency and reliability |
| Use a Stable Testing Environment | Place the instrument on a level, vibration-free workbench | Minimizes external disturbances during testing |
| Calibrate and Verify Regularly | Follow manufacturer recommendations and use suitable viscosity reference standards | Helps identify measurement drift and maintain confidence in results |
| Clean the Instrument After Use | Remove sample residue from the spindle and other accessible components | Prevents contamination and protects measurement performance |
| Perform Repeat Measurements | Conduct replicate tests when required by the testing procedure | Helps assess repeatability and identify abnormal results |
| Document Test Conditions | Record viscosity, temperature, spindle, rotational speed, and sample identification | Supports traceability, reproducibility, and quality control |
| Train Operators Consistently | Establish standard operating procedures and provide regular training | Reduces operator-dependent errors and improves testing efficiency |
| Maintain the Instrument Properly | Inspect spindles, connections, and instrument components periodically | Extends equipment service life and helps prevent unexpected errors |
Summary
To use a digital viscometer effectively, you must do more than power it on and read the screen. You need to prep the instrument first. Pick the right spindle and set the correct speed. Prepare each sample in the same way. Control the temperature closely. Put the spindle in the right position. Wait long enough for the reading to settle.
By following a standardized measurement procedure, recording all key test conditions, and keeping up with routine care. When labs do this, they tend to get repeatable results. They also strengthen quality control and cut down on avoidable testing mistakes.
A digital viscometer, when operated properly, is a vital tool in many areas. This includes chemical work, food processing, pharmaceutical production, and coatings inspection. It supports monitoring of fluid properties and maintaining consistent product quality.
Get Quote Here!
Latest Posts


What Next?
For more information, or to arrange an equipment demonstration, please visit our dedicated Product Homepage or contact one of our Product Managers.


