


A high-quality X-ray diffraction (XRD) analysis begins long before the instrument starts scanning. Even with a well-calibrated XRD diffractometer, poor sample preparation can lead to weak diffraction peaks, unexpected background noise, preferred orientation, or inaccurate phase identification. In many cases, the difference between reliable and misleading XRD results comes down to how the sample is prepared.
Because materials vary widely in their physical form, there is no single XRD sample preparation procedure that works for every application. Powder samples, bulk solids, and thin films each require different preparation techniques to obtain representative diffraction data while minimizing measurement errors.
This article introduces the essential principles of XRD sample preparation, explains how preparation methods differ for various sample forms, and highlights practical considerations that can improve the accuracy and repeatability of sample preparation for XRD analysis. Whether you are performing routine quality control, material research, or laboratory testing, following the appropriate preparation method is one of the simplest ways to obtain more reliable XRD results.
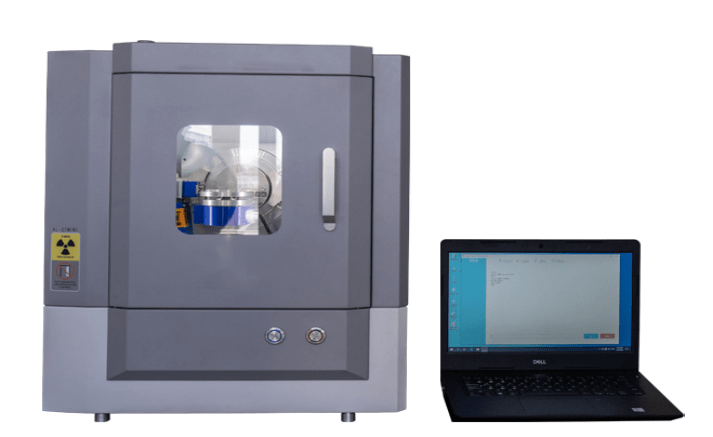
General Considerations for XRD Sample Preparation
Regardless of the material being analyzed, every sample preparation for XRD aims to achieve the same goal: obtaining diffraction data that accurately represents the material itself rather than artifacts introduced during preparation.
Although preparation methods vary depending on whether the sample is a powder, bulk material, or thin film, several general principles apply to almost every XRD sample preparation procedure.
Factors That Affect XRD Data Before Measurement
Before placing a sample into the diffractometer, several preparation factors can already influence the quality of the diffraction pattern.
| Preparation Factor | Possible Influence on XRD Results |
| Particle size | Poor particle statistics or preferred orientation |
| Sample homogeneity | Reduced repeatability and inconsistent peak intensity |
| Surface condition | Increased background or distorted peak intensity |
| Contamination | Additional diffraction peaks or incorrect phase identification |
| Sample packing | Uneven diffraction intensity and poor reproducibility |
Paying attention to these factors during sample preparation for XRD analysis often prevents problems that cannot be corrected later during data processing.
Homogeneity
Ensuring sample homogeneity is one of the most important steps in XRD sample preparation. If different regions of the specimen contain different particle sizes, compositions, or phases, the resulting diffraction pattern may not accurately represent the material as a whole.
For powder samples, grinding, mixing, or sieving can help distribute particles more evenly. For bulk materials, selecting a representative area for analysis is equally important. The objective is not simply to make the sample look uniform, but to ensure that the X-ray beam interacts with a representative portion of the material throughout the measurement.
Minimizing Surface Effects
Surface condition has a direct impact on diffraction quality, especially for bulk materials and thin films.
Rough surfaces, scratches, or strong preferred orientation may alter relative peak intensities and make quantitative analysis more difficult. Where appropriate, polishing or preparing a flatter measurement surface can improve data consistency. However, preparation should avoid introducing unnecessary mechanical stress or deformation that could alter the material itself.
The best preparation method always depends on the material and the purpose of the analysis rather than applying the same treatment to every sample.
Avoiding Contamination
Even small amounts of contamination may introduce additional diffraction peaks or increase background noise, making phase identification more difficult.
Common contamination sources include:
- Dirty sample holders
- Residual grinding media
- Polishing compounds
- Dust from the laboratory environment
- Fingerprints left during handling
Using clean tools, dedicated preparation equipment, and appropriate storage containers helps reduce the risk of contamination before measurement.
Sample Handling Techniques
Proper handling protects the sample throughout the entire preparation process.
Whenever possible, samples should be handled gently to avoid introducing cracks, excessive mechanical deformation, or surface damage. Thin films deserve particular attention because fingerprints or scratches can easily affect measurement quality.
It is also good practice to inspect the prepared sample visually before loading it into the instrument. A clean, uniformly prepared specimen generally produces more consistent diffraction results than one requiring repeated adjustments after mounting.
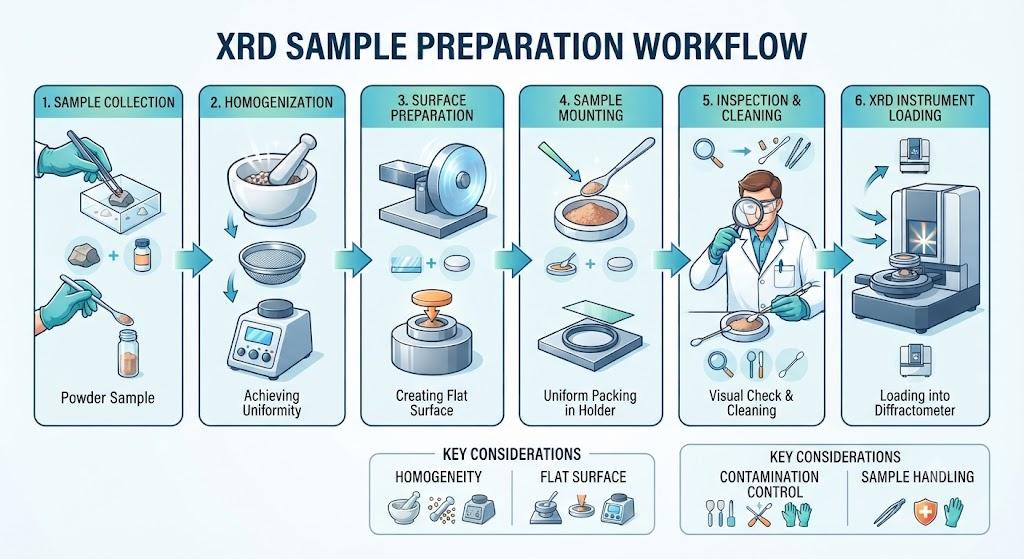
Best Practices Before Running an XRD Measurement
Before starting the measurement, a quick inspection can help identify preparation issues that are easy to correct.
A simple checklist includes:
Although these checks take only a few minutes, they can significantly improve the repeatability of sample preparation for XRD and reduce the likelihood of repeating measurements.
Best Practices for XRD Sample Preparation in Different Forms
Different materials require different XRD sample preparation methods because their physical characteristics directly affect how X-rays interact with the sample. A preparation technique that works well for loose powders may not be suitable for bulk materials or thin films.
The goal is always the same: to produce a representative sample with minimal preparation-induced artifacts while maintaining good measurement repeatability.
The following sections outline recommended sample preparation for XRD analysis for the three most common sample forms.
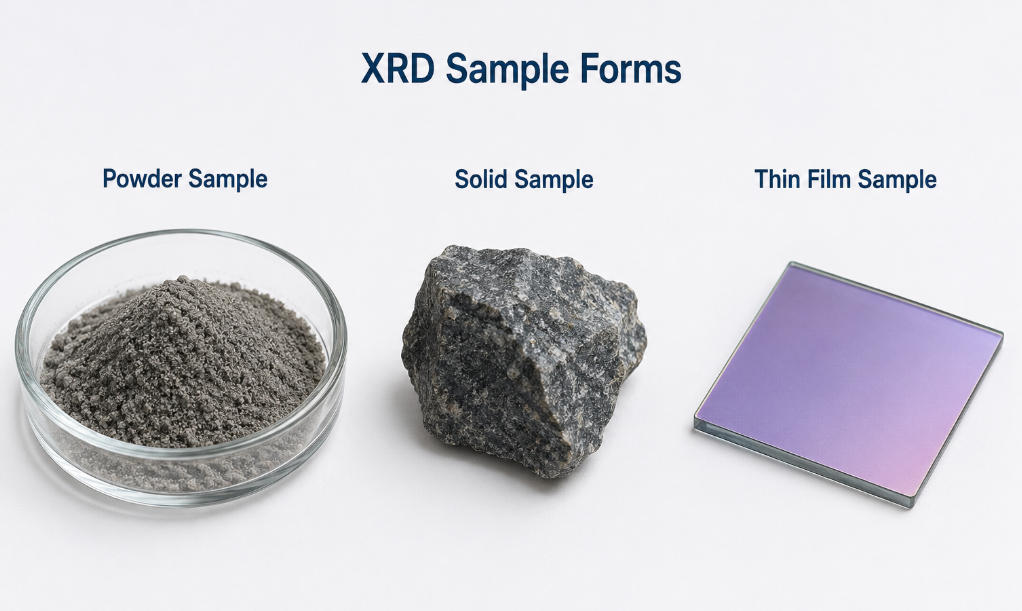
Powder samples are the most common type analyzed by X-ray diffraction because randomly oriented crystallites produce diffraction patterns that are generally easier to interpret. However, powders are also highly sensitive to preparation quality. Particle size, packing density, preferred orientation, and contamination can all influence the final diffraction pattern.
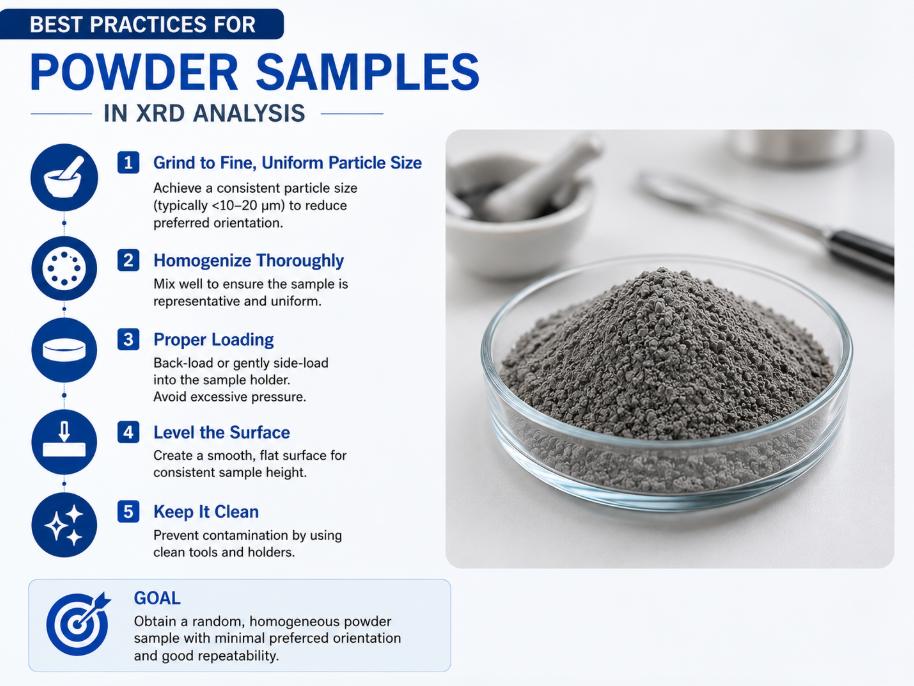
A carefully prepared powder sample helps improve data repeatability, reduces background interference, and provides more reliable phase identification and quantitative analysis.
Grinding and Crushing Techniques
The first step in powder XRD sample preparation is reducing the material to a sufficiently fine and uniform powder.
Grinding helps increase the number of crystallites exposed to the incident X-ray beam, improving particle statistics and reducing sampling bias. Depending on the material, laboratories commonly use mortar and pestle grinding, ball milling, or mechanical grinding systems.
However, finer is not always better.
Excessive grinding may introduce lattice strain, reduce crystallite size, or increase preferred orientation in certain materials. Soft metals, layered materials, and some minerals are particularly susceptible to these effects.
Whenever possible, use the least aggressive grinding method that produces a sufficiently homogeneous sample.
Practical Tip: If the material heats noticeably during grinding, allow it to cool before continuing. Excessive heat may alter moisture-sensitive or temperature-sensitive samples.
Recommended Particle Size for Powder XRD
There is no universal particle size suitable for every sample preparation for XRD application. The appropriate size depends on the material, crystal structure, and analytical objective.
As a general guideline:
| Sample Type | General Recommendation |
| Routine inorganic powders | Fine, uniform particles with minimal agglomeration |
| Hard ceramics | Grinding until particle size is sufficiently reduced without introducing contamination |
| Soft metals | Gentle grinding to avoid excessive deformation |
| Layered materials | Avoid over-grinding to minimize preferred orientation |
| Moisture-sensitive materials | Prepare quickly and store in sealed containers before measurement |
Rather than targeting a specific particle size, the priority should be producing a representative sample with consistent particle distribution while preserving the material’s original crystal structure.
If you are working with nanopowders or other nanostructured materials, sample preparation often requires additional attention. Nanomaterials typically have much smaller crystallite sizes, a higher tendency to agglomerate, and more pronounced peak broadening than conventional powders. These characteristics make proper dispersion, uniform packing, and contamination control even more important for obtaining reliable XRD results. For a more detailed discussion, see What Types of Nanomaterials Are Usually Analyzed by XRD?, which explores common nanomaterial types, their diffraction characteristics, and practical preparation considerations for XRD analysis.
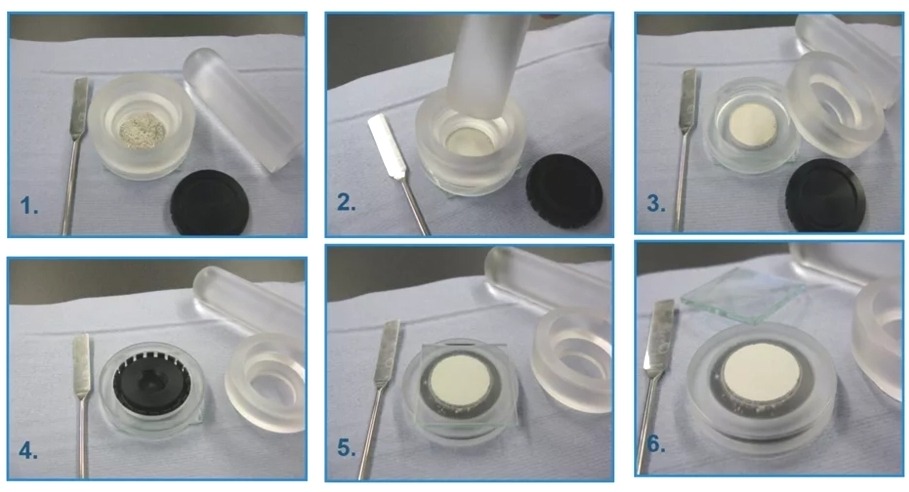
Homogenization Methods
Even after grinding, particle distribution may remain uneven, particularly when the sample contains multiple phases or particles with different hardness.
Mixing, blending, or gentle sieving helps improve homogeneity before loading the sample holder.
For heterogeneous materials, preparing multiple subsamples can provide a better representation than relying on a single portion.
Good homogenization improves the repeatability of sample preparation for XRD analysis, especially when comparing results between different batches or laboratories.
Mounting Procedures
Proper mounting is just as important as grinding.
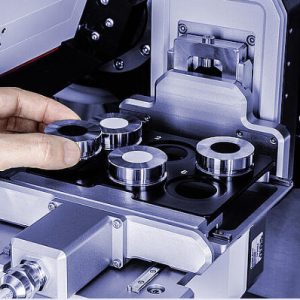
After homogenization, transfer the powder into a clean sample holder and distribute it evenly across the measurement area. The surface should be level without large voids or excessive compression.
Uneven filling may cause inconsistent diffraction intensity because different parts of the sample contribute differently to the diffraction signal.
Whenever possible, avoid touching the measurement surface after leveling the sample.
For routine laboratory analysis, dedicated powder holders or back-loading sample holders often provide better particle randomization than simple top-loading methods.
Surface Smoothing Techniques
A flat and uniform sample surface generally produces more consistent diffraction data.
After filling the holder, lightly level the surface using a glass slide, straight edge, or another suitable tool designed for sample preparation.
The objective is not to compress the powder as tightly as possible, but rather to create a smooth, even surface while minimizing preferred orientation.
Applying excessive pressure may force plate-like or needle-shaped particles into similar orientations, changing the relative peak intensities and making quantitative analysis less reliable.
Back Loading Techniques
For materials that are prone to preferred orientation, back-loading sample holders are often preferred over conventional top-loading methods.
Instead of pressing the powder directly from the measurement surface, the sample is filled from the back of the holder, allowing particles to settle more naturally. This approach helps maintain a more random crystallite orientation and often improves measurement reproducibility.
The choice of holder depends on the instrument configuration and analytical requirements. Dedicated low-background holders are also available for applications where background reduction is particularly important.
Common Powder Sample Preparation Mistakes
Many measurement problems originate during preparation rather than during data collection.
The table below summarizes several common issues.
| Common Mistake | Possible Effect on XRD Results |
| Over-grinding | Crystal damage or preferred orientation |
| Uneven particle distribution | Poor repeatability |
| Excessive compression | Intensity distortion |
| Contaminated grinding tools | Unexpected diffraction peaks |
| Uneven sample surface | Inconsistent peak intensity |
| Moisture absorption | Changes in diffraction pattern for sensitive materials |
Most of these problems can be avoided with standardized preparation procedures and careful handling.
Choosing the Right Holder for Powder Samples
Different powder holders are designed for different analytical objectives.
| Holder Type | Typical Application |
| Standard powder holder | Routine qualitative analysis |
| Back-loading holder | Materials prone to preferred orientation |
| Low-background holder | Weakly diffracting samples |
| Capillary holder | Small sample quantities or transmission geometry |
Selecting an appropriate holder is often just as important as choosing the correct XRD sample preparation procedure.
Instrument Considerations for Powder XRD Analysis
While sample preparation remains the foundation of reliable diffraction analysis, choosing an appropriate XRD system also contributes to measurement efficiency and data quality.
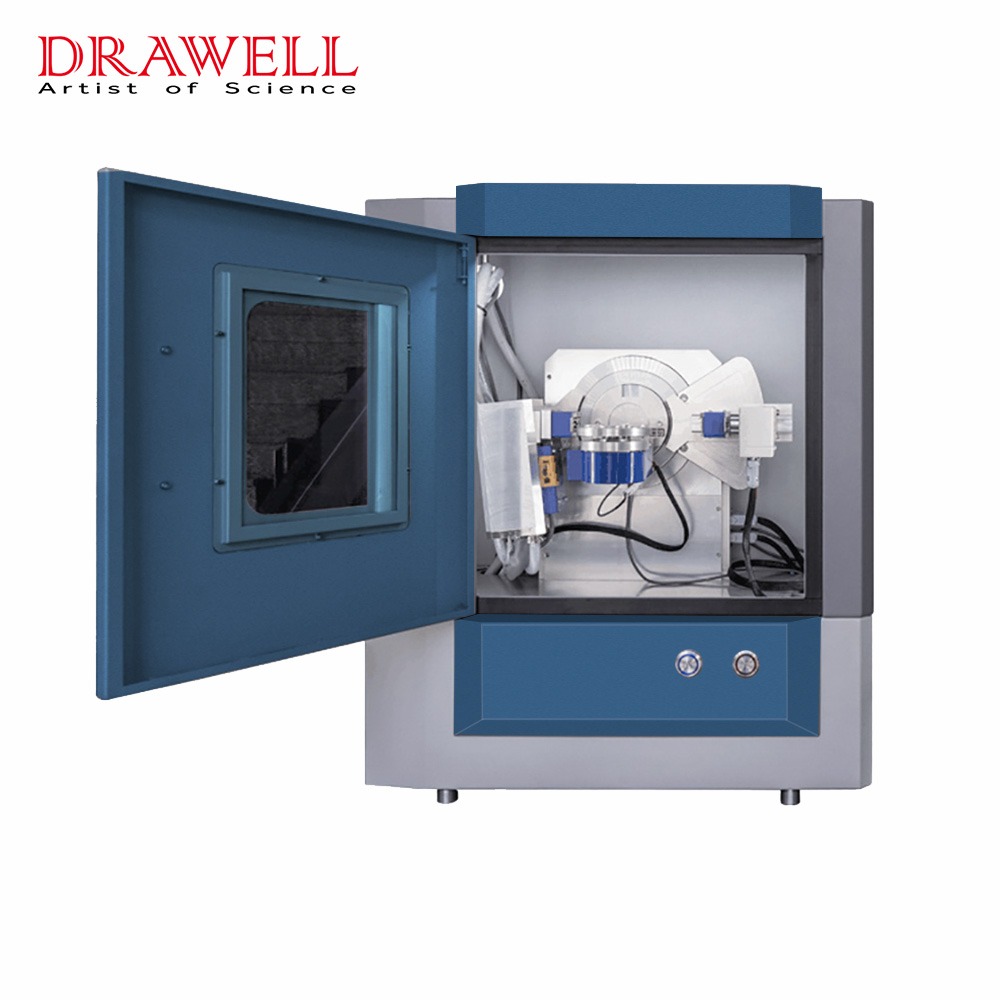
For routine quality control, teaching laboratories, and research applications with limited sample throughput, compact benchtop instruments such as the DW-XRD-27Mini Desktop XRD offer convenient operation and straightforward powder analysis.
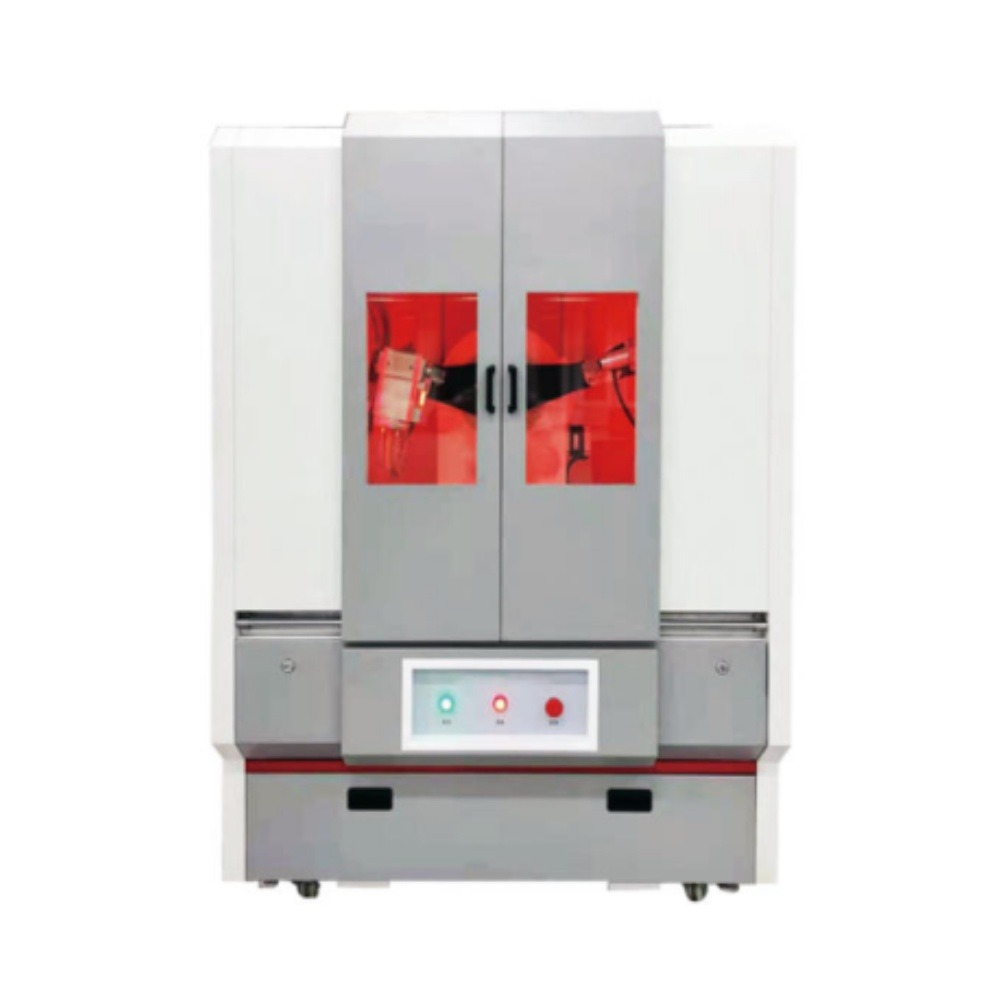
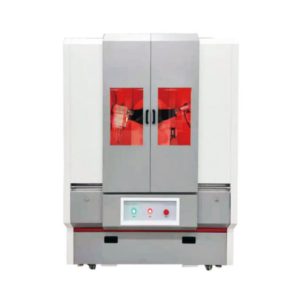
Laboratories processing a wider range of materials or requiring higher throughput may benefit from floor-standing systems such as the DW-XRD-Y3500 X-ray Diffractometer, which supports multiple sample configurations for powders, bulk materials, and thin films.
Regardless of the instrument used, consistent powder XRD sample preparation remains essential for obtaining reproducible diffraction data.
Unlike powder samples, bulk materials require preparation that exposes a representative surface without significantly changing the material itself. The goal of sample preparation for XRD analysis is to minimize preparation-induced artifacts while preserving the original crystal structure.
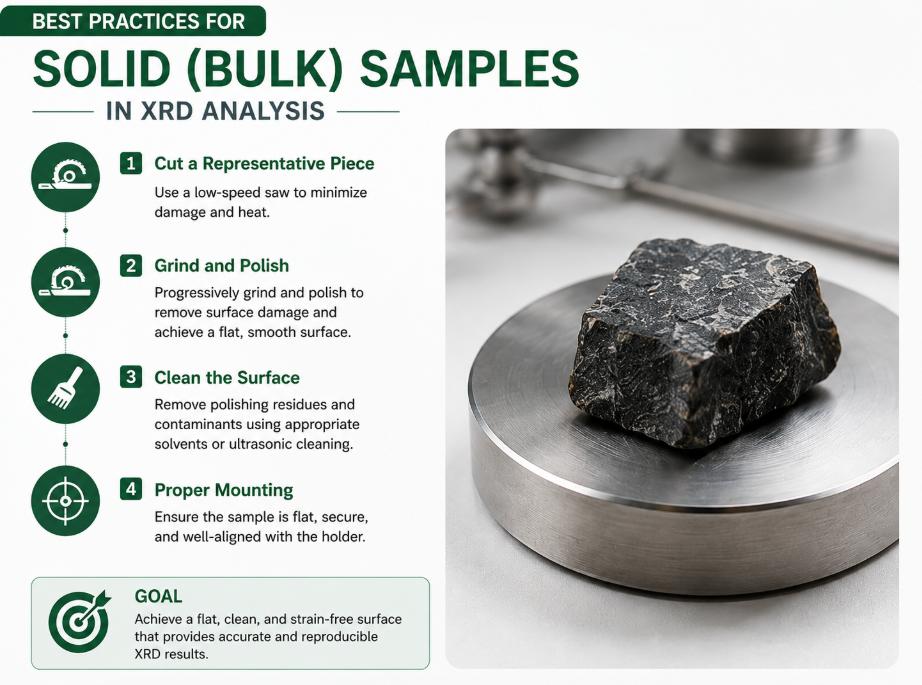
The exact preparation method depends on the material’s hardness, brittleness, surface condition, and the purpose of the analysis. In many cases, less preparation is preferable if it preserves the integrity of the specimen.
Sectioning Techniques
Large or irregular samples often need to be cut into a suitable size before XRD analysis.
The cutting method should remove enough material to create a flat measurement surface while minimizing heat generation and mechanical deformation.
Common sectioning methods include:
| Sectioning Method | Typical Applications |
| Diamond saw | Metals, ceramics, minerals |
| Low-speed precision saw | Small research specimens |
| Wire saw | Brittle materials requiring minimal damage |
| Fracturing | Geological samples and naturally cleaved crystals |
Whenever possible, excessive cutting forces should be avoided, as they may introduce residual stress into the near-surface region.
When Is Surface Polishing Necessary?
Not every solid sample requires mirror polishing.
Surface polishing is mainly recommended when surface roughness may interfere with diffraction measurements or when quantitative analysis requires improved surface consistency.
Examples include:
- Dense ceramics
- Sintered materials
- Metal alloys
- Precision engineering materials
Conversely, materials that fracture naturally along clean crystallographic planes may only require gentle cleaning before analysis.
The objective is to reduce surface irregularities—not to modify the crystal structure itself.
Surface Polishing Methods
After sectioning, the sample surface may require additional preparation to remove cutting marks or machining damage.
Polishing is typically performed in several stages using progressively finer abrasives.
A gradual approach generally produces better results than attempting to remove deep scratches in a single step.
Depending on the material, common polishing media include:
- Silicon carbide papers
- Diamond suspensions
- Alumina polishing compounds
During polishing, excessive pressure should be avoided because it may introduce deformation layers that influence diffraction results, particularly in ductile metals.
Choosing the Right Cutting and Preparation Method
Different materials respond differently to mechanical preparation.
The following table provides general guidance.
| Material | Recommended Preparation |
| Steel and alloys | Diamond cutting followed by light polishing |
| Ceramics | Diamond cutting with careful polishing |
| Geological specimens | Cutting or natural fracture depending on structure |
| Single crystals | Minimal preparation whenever possible |
| Cement and concrete | Sectioning followed by surface flattening |
Rather than following one universal procedure, preparation should always match the characteristics of the material being analyzed.
Mounting Procedures
Once the measurement surface has been prepared, the specimen should be mounted securely to prevent movement during scanning.
The sample surface should remain as parallel as possible to the sample stage. Poor alignment may shift diffraction peak positions or reduce measurement repeatability.
If adhesives are required, only suitable low-background mounting materials should be used to avoid introducing unwanted diffraction signals.
Surface Protection Before Measurement
Prepared samples should be protected from contamination before measurement.
For materials sensitive to oxidation or moisture, minimizing exposure to laboratory air may help preserve the original surface condition.
Simple precautions include:
- Wearing clean gloves
- Covering prepared specimens
- Cleaning loose polishing residue
- Avoiding direct contact with the measurement surface
These small steps often improve measurement consistency without adding complexity to the preparation workflow.
Instrument Considerations for Bulk Materials
Bulk samples generally require larger sample stages and greater flexibility in positioning than routine powder analysis.
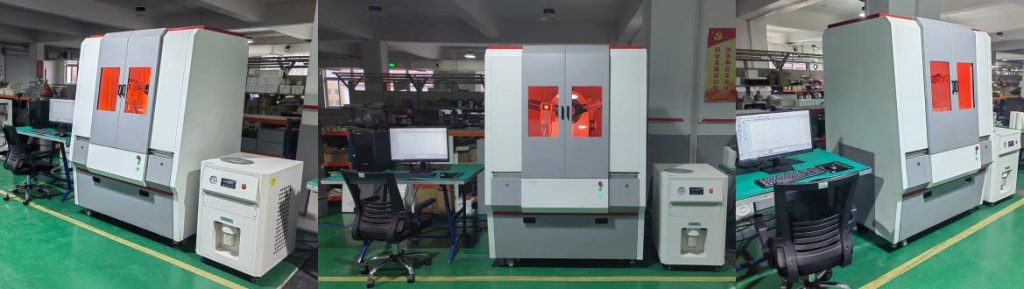
Laboratories handling a variety of engineering materials, ceramics, geological specimens, or research samples often benefit from floor-standing XRD systems that support multiple sample geometries.
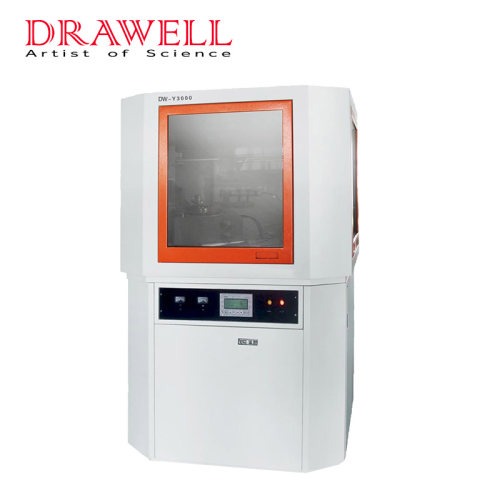
For example, the DW-XRD-Y3000 X-ray Diffraction Instrument and DW-XRD-Y3500 X-ray Diffractometer are designed to accommodate different specimen sizes while supporting routine qualitative and quantitative XRD analysis.
Regardless of instrument configuration, proper sample preparation for XRD remains the foundation for obtaining reliable diffraction data.
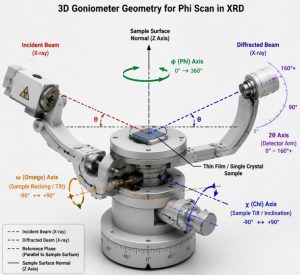
Thin films present different preparation challenges from powders and bulk materials because the material of interest often measures only a few nanometers to several micrometers in thickness. Small preparation errors can significantly influence diffraction intensity or increase background interference from the substrate.
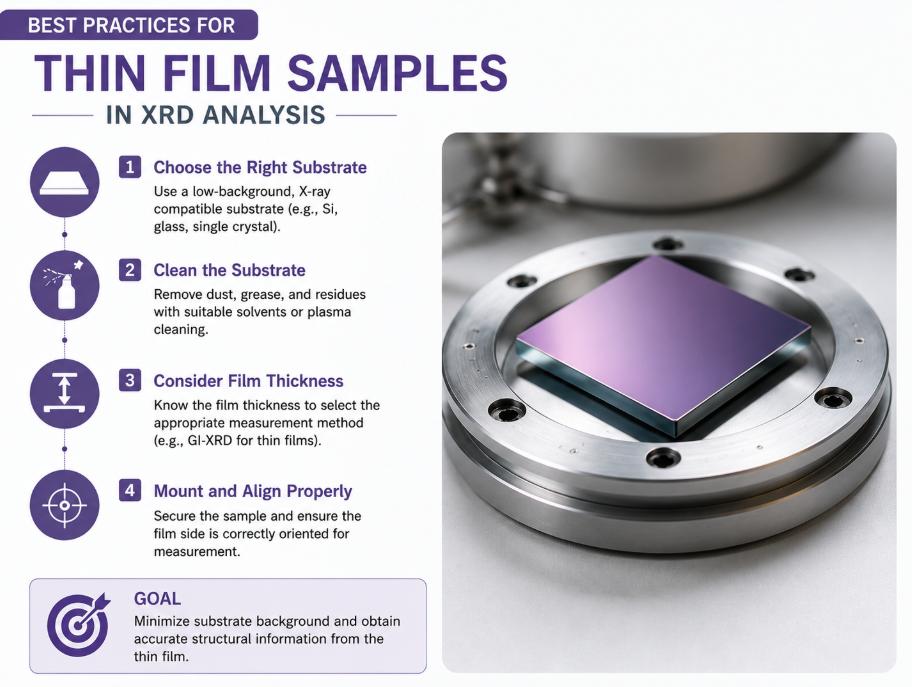
Careful handling is therefore an essential part of XRD sample preparation for thin-film analysis.
Substrate Cleaning Procedures
Preparation begins with a clean substrate.
Dust particles, fingerprints, polishing residues, and organic contamination can all affect diffraction measurements, particularly for very thin coatings.
Common cleaning methods include:
- Isopropyl alcohol (IPA)
- Acetone
- Deionized water
- Nitrogen or clean air drying
The cleaning procedure should always be compatible with both the substrate and the deposited film.
Why Substrate Selection Matters
The substrate contributes its own diffraction pattern during measurement.
Selecting an appropriate substrate helps reduce unwanted background peaks and simplifies data interpretation.
Common substrate materials include:
| Substrate | Typical Applications |
| Silicon | Semiconductor materials |
| Glass | Optical coatings |
| Sapphire | Epitaxial thin films |
| Quartz | High-temperature applications |
The choice depends on the material system rather than following a universal rule.
Thin Film Deposition Considerations
Although deposition usually occurs before XRD analysis, understanding the deposition method helps explain the resulting diffraction pattern.
Common deposition techniques include:
- Physical Vapor Deposition (PVD)
- Chemical Vapor Deposition (CVD)
- Magnetron Sputtering
- Spin Coating
- Atomic Layer Deposition (ALD)
Different deposition processes influence film thickness, crystallinity, preferred orientation, and residual stress.
These factors should be considered when interpreting diffraction results rather than during data processing alone.
Thickness Measurement
Film thickness is often measured before XRD analysis because it directly influences diffraction intensity.
Depending on the application, thickness may be determined using:
- Profilometry
- Ellipsometry
- Cross-sectional SEM
- Reflectometry
Knowing the approximate thickness also helps determine whether grazing incidence XRD or conventional XRD is more appropriate.
Mounting and Handling Considerations
Thin films are often more susceptible to handling damage than bulk materials.
Whenever possible:
- Hold the sample by its edges.
- Avoid touching the coated surface.
- Prevent dust accumulation.
- Store samples in clean containers before measurement.
Even small scratches or fingerprints may influence diffraction quality, particularly for very thin functional coatings.
Avoid Common Thin Film Handling Errors
Several preparation mistakes repeatedly appear in routine thin-film analysis.
| Common Issue | Possible Influence |
| Fingerprints | Increased background |
| Dust particles | Additional diffraction features |
| Scratches | Local film damage |
| Incorrect sample orientation | Reduced measurement repeatability |
| Poor substrate cleaning | Surface contamination |
Many of these issues are easy to avoid with careful handling throughout the XRD sample preparation procedure.
Specialized Sample Environments
Some thin-film applications require measurements under controlled environmental conditions.
Examples include:
- High-temperature diffraction
- Controlled atmosphere measurements
- In-situ phase transformation studies
- Stress evolution during heating
When these experiments are required, the sample holder and preparation method should be compatible with the selected environmental stage.
Instrument Considerations for Thin Film Analysis
Thin-film characterization often requires flexible measurement geometry and high positioning accuracy.
Depending on the analytical requirements, laboratories may choose benchtop or floor-standing XRD systems equipped with appropriate accessories for thin-film measurements.
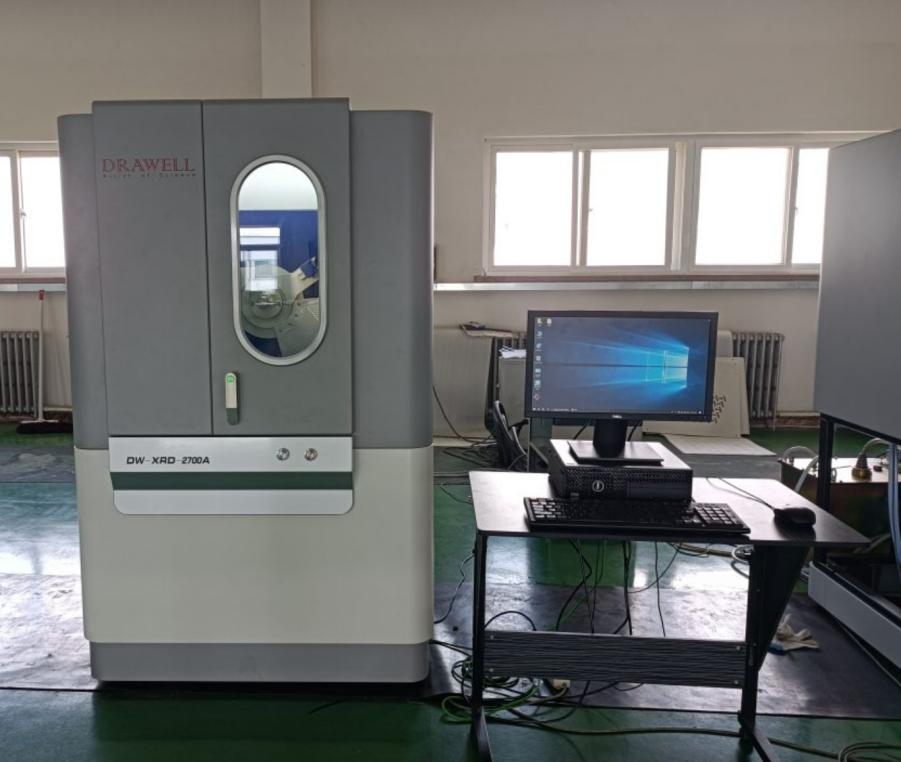
Drawell’s DW-XRD-Y3500 supports a wide range of XRD applications, including powders, bulk materials, and thin films, making it suitable for laboratories working with multiple sample types.
Troubleshooting Common Sample Preparation Issues
Even with a well-planned XRD sample preparation procedure, issues can still occur and affect diffraction quality. Many apparent instrument problems actually originate during sample preparation. Identifying the root cause before repeating a measurement not only saves time but also improves the reliability and repeatability of sample preparation for XRD analysis.
The table below summarizes common preparation-related issues, their possible causes, and practical solutions.
| Common Issue | Possible Cause | Recommended Solution |
| Unexpected diffraction peaks | Contamination from the sample, holder, or preparation tools | Clean the sample and preparation tools thoroughly, use dedicated sample holders, and verify sample purity if contamination is suspected. |
| Weak diffraction peaks | Insufficient sample quantity, poor packing, or low crystallinity | Reload the sample with a uniform surface, ensure sufficient sample volume, and verify the measurement geometry. |
| Poor repeatability | Uneven particle distribution or inconsistent sample mounting | Re-homogenize the sample, follow a standardized loading procedure, and analyze multiple aliquots when appropriate. |
| Preferred orientation | Excessive grinding, compression, or particle alignment | Reduce grinding intensity, minimize surface compression, or use a back-loading sample holder. |
| High background | Surface contamination, fingerprints, or unsuitable sample holder | Clean the sample surface carefully and use an appropriate low-background holder if required. |
| Peak position shifts | Sample displacement or improper mounting | Verify sample alignment and ensure the specimen is securely mounted before measurement. |
5 Troubleshooting Tips
Identifying Contamination
Contamination is one of the most common causes of unexpected diffraction peaks. Foreign particles may originate from grinding media, polishing compounds, dirty sample holders, or even dust introduced during sample handling.
If contamination is suspected:
- Clean the sample using a solvent that is compatible with the material.
- Inspect and clean the sample holder and preparation tools before reuse.
- Store prepared samples in clean, sealed containers whenever possible.
- If contamination cannot be confirmed visually, complementary analytical techniques such as SEM or EDS can help identify foreign particles before repeating the XRD measurement.
Improving Sample Homogeneity
Poor sample homogeneity often leads to inconsistent peak intensities and poor measurement repeatability, especially for heterogeneous powders or multi-phase materials.
To improve sample homogeneity:
- Re-grind or gently remix the sample if particle segregation is observed.
- Ensure powders are thoroughly mixed before loading the sample holder.
- Avoid separating coarse and fine particles during handling.
- When complete homogenization is difficult, analyze multiple sample aliquots to obtain a more representative assessment of the material.
Consistent preparation procedures are especially important when comparing different batches or performing quantitative analysis.
Correcting Surface Irregularities
For bulk materials and polished specimens, surface condition can significantly influence diffraction quality.
If surface irregularities are observed:
- Polish the surface progressively using finer abrasives where appropriate.
- Remove polishing residue before mounting the sample.
- Avoid excessive polishing pressure that may introduce deformation layers or residual stress.
- Verify that the measurement surface is flat enough to maintain consistent sample height during analysis.
Preventing Sample Damage
Mechanical damage introduced during preparation may alter the sample surface or reduce measurement quality.
To minimize damage:
- Handle specimens carefully throughout the preparation process.
- Avoid unnecessary mechanical stress during cutting or polishing.
- Mount samples securely to prevent movement during measurement.
- For fragile or irregular specimens, use suitable support fixtures or dedicated sample holders to improve stability.
Careful handling is particularly important for brittle ceramics, thin films, and delicate research specimens.
Check Instrument Parameters Before Repeating the Measurement
If preparation-related issues have been ruled out but the diffraction pattern still appears abnormal, verify that the instrument is operating correctly before preparing another sample.
A quick inspection should include:
- Instrument alignment
- Calibration status
- Scan range and scan speed
- Detector configuration
- Sample height and measurement geometry
Checking these parameters helps distinguish sample preparation issues from instrument-related problems and can prevent unnecessary sample re-preparation.
Quick Troubleshooting Guide
If you notice one of the following symptoms, check these preparation factors first.
| If You Observe… | Check First |
| Extra diffraction peaks | Sample contamination or dirty preparation tools |
| Weak diffraction peaks | Sample quantity, packing density, and alignment |
| Broad diffraction peaks | Crystallite size, excessive grinding, or microstrain |
| Peak position shifts | Sample height and mounting accuracy |
| High background | Surface contamination or inappropriate sample holder |
| Poor repeatability | Sample homogeneity and loading consistency |
This quick reference can help identify the most likely preparation-related cause before repeating an XRD measurement.

Choosing the Right XRD Sample Holder
Selecting an appropriate sample holder is an important part of sample preparation for XRD, but it is often overlooked.
Different holder designs help reduce preparation-induced errors and improve measurement repeatability.
| Sample Holder | Suitable For | Main Advantage |
| Standard Powder Holder | Routine powder analysis | Simple and versatile |
| Back-Loading Holder | Plate-like or flaky powders | Reduces preferred orientation |
| Low-Background Holder | Weakly diffracting materials | Minimizes background interference |
| Capillary Holder | Small sample quantities or transmission geometry | Suitable for specialized measurements |
| Bulk Sample Stage | Metals, ceramics, geological specimens | Supports larger or irregular samples |
| Thin Film Stage | Coated substrates and thin films | Accurate positioning for surface analysis |
The best holder depends on the sample form, analytical objective, and instrument configuration rather than a single universal recommendation.
For laboratories handling multiple sample types, XRD systems with interchangeable sample holders provide greater flexibility while simplifying routine analysis.
Sample Preparation Checklist Before XRD Analysis
Before starting an XRD measurement, a quick final inspection can help reduce preparation-related errors.
Use the checklist below as a reference.
Sample Condition
✔ The sample is representative of the material.
✔ The required preparation method matches the sample type.
✔ The sample is clean and free of visible contamination.
Sample Surface
✔ Powder surface is level.
✔ Bulk specimen surface is suitable for measurement.
✔ Thin-film surface is free from scratches and fingerprints.
Sample Holder
✔ Correct holder selected.
✔ Sample securely mounted.
✔ Holder is clean and undamaged.
Instrument Readiness
✔ Instrument calibration has been verified.
✔ Measurement geometry matches the sample type.
✔ Scan parameters have been reviewed.
Although simple, this checklist helps improve the consistency of XRD sample preparation procedures, especially in laboratories where multiple users share the same instrument.
Conclusion
Reliable XRD results begin with reliable sample preparation.
Whether the sample is a powder, bulk material, or thin film, following an appropriate XRD sample preparation procedure helps reduce measurement errors, improve repeatability, and produce diffraction data that more accurately represents the material being analyzed.
Equally important, preparation should always be matched to the characteristics of the sample rather than applying the same workflow to every material. Careful grinding, proper mounting, contamination control, and selecting the right sample holder can all make a noticeable difference in data quality.
If your laboratory routinely analyzes different sample forms, choosing an XRD system that supports multiple sample configurations can further simplify the workflow while improving efficiency. Drawell offers a range of X-ray diffraction instruments designed for research, quality control, and routine laboratory applications, helping users achieve reliable results across a wide variety of materials.
Explore Drawell’s XRD product range to find a solution that best fits your analytical requirements, or contact the team if you need guidance on selecting an instrument for your specific application.

Frequently Asked Questions
Get Quote Here!
Latest Posts



What Next?
For more information, or to arrange an equipment demonstration, please visit our dedicated Product Homepage or contact one of our Product Managers.


