

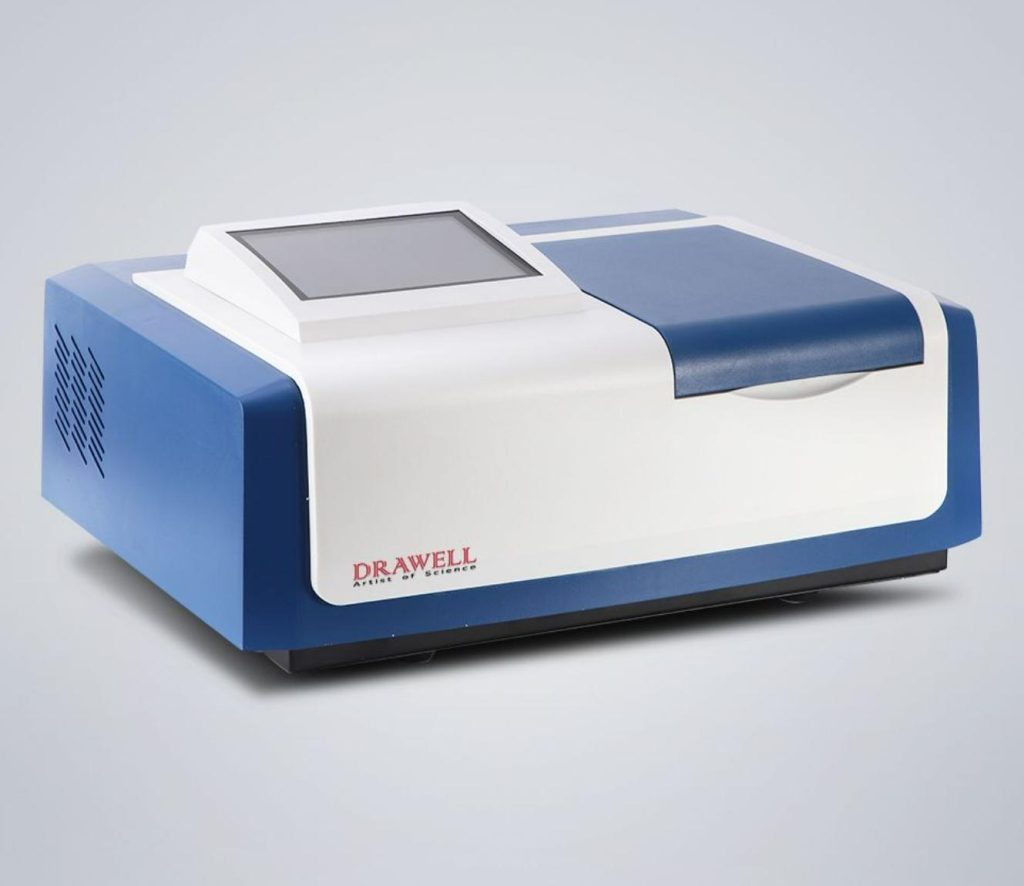
In the field of analytical chemistry, UV-Vis spectrophotometers are indispensable tools for studying the interaction of light with matter. These instruments allow scientists and researchers to measure the absorption or transmission of light across the ultraviolet (UV) and visible (Vis) regions of the electromagnetic spectrum. Whether you’re a student conducting experiments in a laboratory or a seasoned scientist analyzing complex samples, understanding how to use a UV-Vis spectrophotometer is crucial for accurate and reliable results. In this article, we will guide you through the essential steps of operating a UV-Vis spectrophotometer, empowering you to confidently explore the world of light-matter interactions and unlock valuable insights in your research.
Here Is A General Guide on How to Use A UV-Vis Spectrophotometer:
1. Familiarize yourself with the instrument: Read the user manual provided by the manufacturer to understand the specific features and functions of your UV-Vis spectrophotometer. Ensure that the instrument is in good working condition.
2. Prepare your sample: Depending on your analysis, prepare a sample that is suitable for UV-Vis measurements. This may involve diluting the sample, filtering it to remove particulate matter, or other necessary steps.
3. Set up the instrument: Ensure that the spectrophotometer is properly connected to a power source and turned on. Allow it to warm up if required, as per the manufacturer’s instructions. Set the wavelength range and other parameters specific to your analysis.
4. Blank measurement: Before measuring your sample, it’s important to perform a blank measurement. This involves measuring the baseline absorbance of the solvent or reagent used in your sample, without any analyte present. This establishes a reference point for subsequent measurements.
5. Calibration (if necessary): Depending on your analysis, you may need to calibrate the instrument using appropriate calibration standards. This is especially important when quantitative measurements are required.
6. Sample measurement: Place the prepared sample into a suitable cuvette, which is a transparent container designed for holding liquid samples. Ensure that the cuvette is clean and free from scratches or defects that may affect the measurement. Insert the cuvette into the sample compartment of the spectrophotometer.
7. Select the desired wavelength: Set the spectrophotometer to the desired wavelength for your measurement. This can typically be done using a control panel or software interface provided with the instrument.
8. Measure the absorbance: Initiate the measurement, and the spectrophotometer will emit light at the selected wavelength through the sample. The instrument will then measure the amount of light absorbed by the sample, which is indicated as absorbance (A). The absorbance value is proportional to the concentration of the absorbing species in the sample.
9. Record the data: Note down the absorbance value obtained from the spectrophotometer. If you’re conducting a series of measurements at different wavelengths, record the data for each wavelength.
10. Analysis and interpretation: Depending on your experiment, you can further analyze the obtained data using appropriate mathematical or statistical methods. Compare the absorbance values to calibration curves or reference data to determine the concentration or other relevant parameters of your sample.
11. Clean up: After completing your measurements, clean the cuvettes thoroughly to remove any sample residues. Follow proper disposal procedures for any chemicals or waste generated during your analysis.
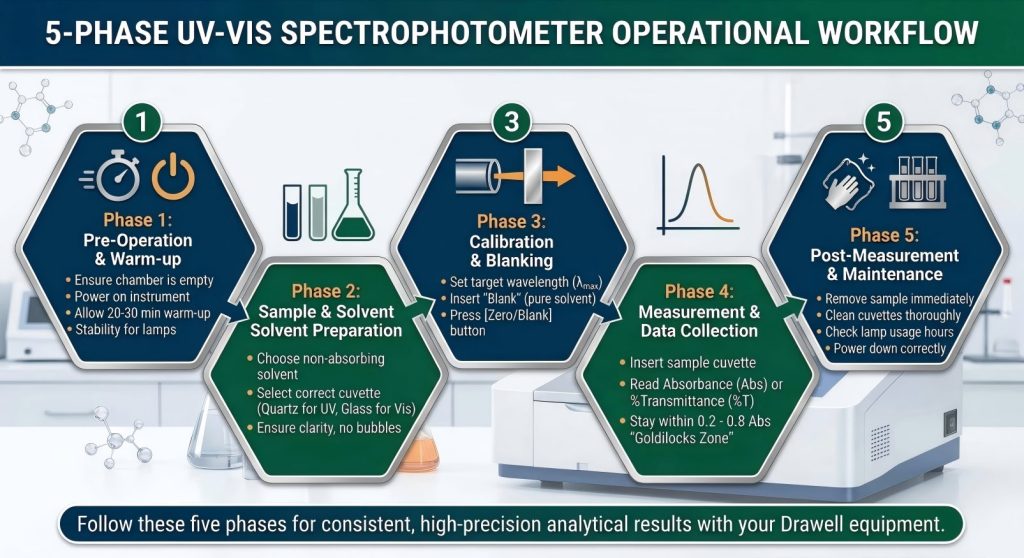
Whether you are performing a simple concentration check or a complex multi-wavelength scan, keeping these five stages in mind will help you maintain the integrity of your results and the longevity of your Drawell equipment. For a deeper dive into the specific nuances of each phase, let’s explore the expert insights and common troubleshooting steps below.
Expert Insights: Optimization & “Safety Zones”
Operating the machine is one thing; optimizing it is another. As experts in analytical instrumentation, we see the same minor mistakes leading to big errors. Let’s talk about how to get it right the first time.
The “Sweet Spot” of Absorbance
A common misconception is that a higher absorbance reading means more “precise” data. In reality, the most reliable data lives within a specific window.
| Absorbance Range | Reliability Level | Action Required |
| 0.0 – 0.1 | Low | Higher risk of signal-to-noise interference. |
| 0.2 – 0.8 | Optimal | The “Goldilocks” zone for maximum accuracy. |
| 1.0 – 2.0 | Moderate | Potential loss of linearity due to stray light. |
| > 2.0 | Critical | Dilute your sample. The detector is receiving too little light. |
Managing Your Cuvettes Like a Pro
Think of your cuvette as a lens. Any scratch, fingerprint, or smudge becomes part of your data. For DNA or protein work (anything below 340nm), you must use Quartz Cuvettes. Standard glass or plastic will absorb the UV light itself, giving you a massive (and false) absorbance spike. Also, remember the “Orientation Rule”: always place the cuvette in the holder with the same face pointing toward the light beam to eliminate microscopic glass inconsistencies.
The Science of “Blanking”
Your “Blank” isn’t just water; it should be the exact matrix of your sample minus the analyte. If your sample is dissolved in 0.1M HCl, your blank must be 0.1M HCl. This accounts for the refractive index and any background absorption of the chemicals themselves.
Beyond the Manual: Troubleshooting & FAQ
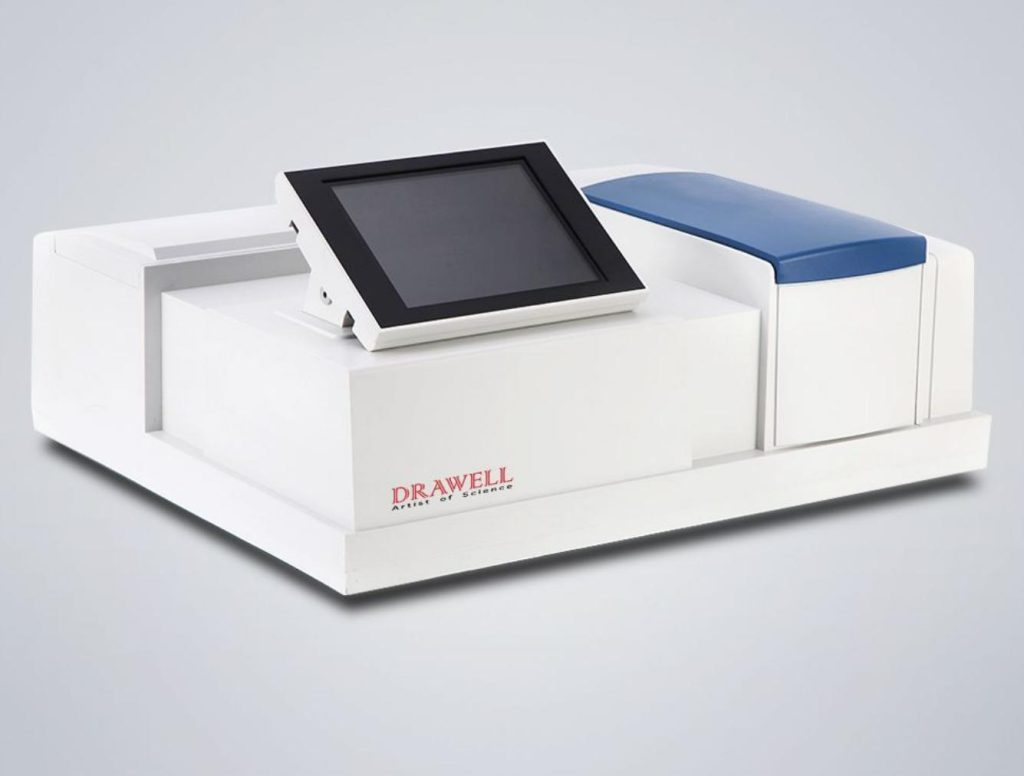
Even with a top-tier Double Beam UV-Vis Spectrophotometer, things can go sideways. Here are the most frequent hurdles lab users face:
“My readings are drifting downward. Is the machine broken?”
Probably not! This is usually a sign of insufficient warm-up or a lamp reaching the end of its life. Deuterium lamps typically last about 1,000 to 2,000 hours. If you notice a “shaky” baseline, check the lamp usage hours in your Drawell system settings.
“Can I measure cloudy samples?”
Standard UV-Vis units don’t play well with turbidity because the particles scatter light rather than absorbing it. If your solution looks “milky,” try centrifuging or filtering it through a 0.45μm membrane first. If the turbidity is what you want to measure (like cell density), ensure you are using a consistent agitation method.
“Why do I get negative absorbance?”
This usually happens if your sample is cleaner than your blank. Did you accidentally swap the cuvettes? Or perhaps your blank solution was contaminated? Always re-zero with a fresh, pure solvent if you see a negative sign.
“How often should I calibrate?”
For ISO-regulated labs, an annual professional calibration is a must. For daily peace of mind, many Drawell models feature built-in GLP self-diagnostics that check wavelength accuracy and lamp energy every time you switch them on.
Final Thoughts: Precision is a Habit
At the end of the day, a spectrophotometer is only as good as the technique of the person using it. By respecting the warm-up time, choosing the right cuvettes, and staying within the optimal absorbance range, you transform your instrument from a simple tool into a precision powerhouse.
Ready to upgrade your lab’s capabilities? Whether you need a robust Portable Spectrophotometer for field work or a high-precision Scanning UV-Vis for complex R&D, our team at Drawell is here to help.
Explore the Full Drawell Spectrophotometer Range Here, or reach out to our specialists for a tailored quote. Let’s get your chemistry right!
Get Quote Here!
Latest Posts

What Next?
For more information, or to arrange an equipment demonstration, please visit our dedicated Product Homepage or contact one of our Product Managers.


